 Table
of Contents
  Previous
Section
Custom Marker
Not all legal HTML elements can be created directly
using WebObjects Builder's buttons or menu commands. However, you can create
any type of element using the custom tag.
To create an HTML element using a custom marker:
-
Place the cursor where you want the element.
-
Click
 .
.
 appears in the component window. You can replace
the text "Custom Marker" with the content of the element (if any).
-
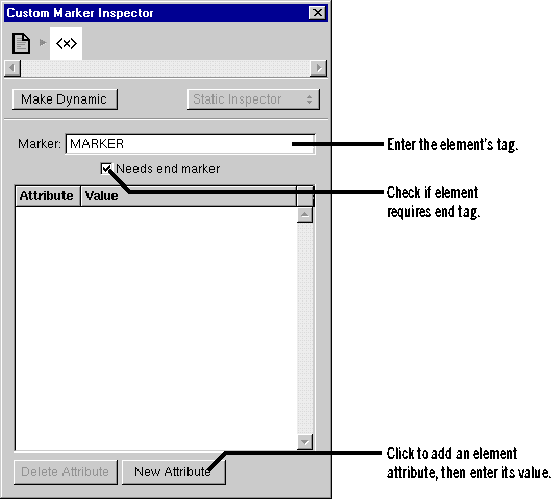
In the Inspector, enter the tag's name in the Marker field.
-
If the element doesn't require an end tag, uncheck "Needs end marker."
-
If the element has attributes you want to specify, click New Attribute,
then enter the attribute's name and value.

For example, if you want to create a <DL> element,
you would create a custom marker and enter DL for its name in the Inspector's
Marker text field. Because "Needs end marker" is checked, the </DL>
end tag is inserted for you.
You can also enter source editing mode and
type the marker and its text directly.
Tip: To save a custom element so you
can use it again, save it on a palette. See "Palettes".
Removing Elements or Text From a Container
You can remove an element or text from a containing
element. For example, if you've typed some text inside a form, but you
decide you want the text to be outside the form:
-
Select the text.
-
Click
 or choose Elements
  Promote
Selection.
This causes the text to be removed from the form.
 Table
of Contents
  Next
Section
 .
.  appears in the component window. You can replace
the text "Custom Marker" with the content of the element (if any).
 Table
of Contents
  Previous
Section
 .
.  appears in the component window. You can replace
the text "Custom Marker" with the content of the element (if any).
 or choose Elements
  Promote
Selection.
  Table
of Contents
  Next
Section