-
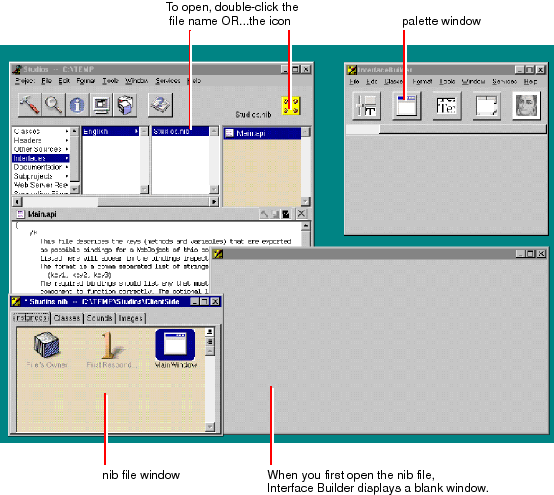
Open the StudioManager.nib file.
In the project browser navigate to Subprojects  ClientSideJava
  Interfaces
  English.
Select
.
Double-click to open.
By default, a blank window appears when Interface Builder is launched. This is the window you'll use to create your user interface.
The Interface Builder application is located in the WebObjects program group. The icon for the application is this:
In Interface Builder you typically construct a user interface by dragging objects from a palette and dropping them into the window. Java Client WebObjects applications require that two special palettes be loaded into Interface Builder:
-
EOPalette.palette includes two
objects: EODisplayGroup and EOEditingContext.
-
EOJavaClientPalette.palette has no visible objects but contains the code that creates Swing objects equivalent to the Yellow Box objects on the standard palettes.
If these palettes are not loaded, you must load them.
-
Load the required palettes.
In Interface Builder, choose Tools  Palettes
  Open.
Open.
In the Open Palette panel, navigate to
Double-click
.
Perform the same sequence of steps, but this time load
.
You'll be dragging objects off of the palette later. For now, however, you can construct a basic interface for a Java Client WebObjects application by simply dragging icons from EOModeler into Interface Builder.
-
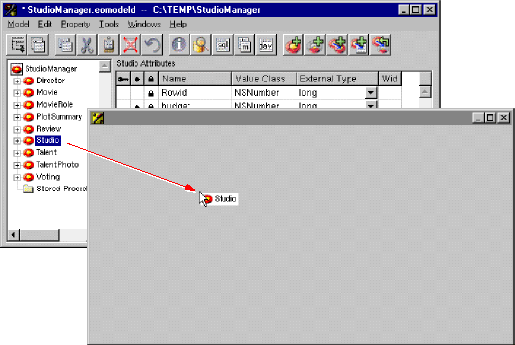
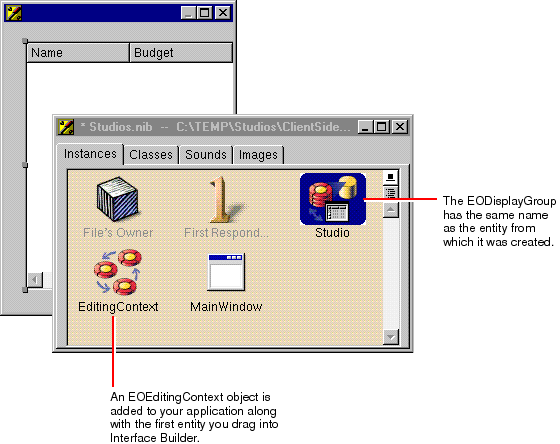
Drag the Studio entity from EOModeler into the window.
The following figure shows the results of dragging an entity into your window. In the nib file window, there's a new EODisplayGroup that's named "Studio" after the entity you dragged in. Note that the nib file window also includes an EOEditingContext object. An EOEditingContext object is added to your application along with the first entity you drag into Interface Builder. Because a document typically only needs one EOEditingContext, this object is only added once.
Related Concepts:
What are EODisplayGroups and EOEditingContexts?
An
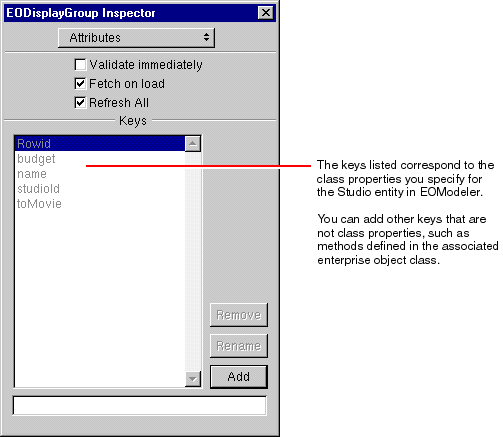
entity EODisplayGroup has keys that correspond to the properties in its associated entity. You can examine these keys in the EODisplayGroup Inspector.
-
Examine the EODisplayGroup in the Inspector.
Select the Studio EODisplayGroup in the nib file window.
Choose Tools  Inspector.
Make sure that the
"Fetch on load" checkbox is checked.
The "Fetch on load" option is important because it allows data to be fetched from the database when you start your application.
The interface that was created when you dragged an entity into the window is already a functional (if simple) application. You can test it.
-
Test the interface.
On Mac OS X Server, choose Document  Test Interface. Click
  in the menu bar to exit the test.
On Windows NT, choose File  Test Interface. Choose File
  Exit to exit the test.
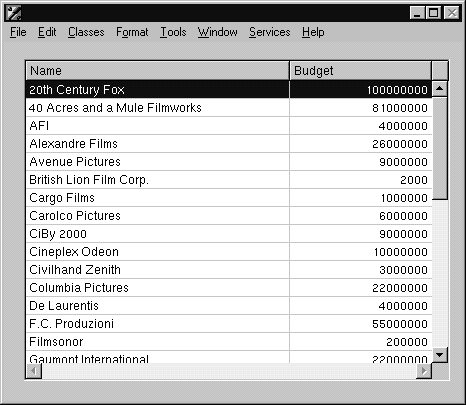
Note that because the "Fetch on load" option was enabled for the Studio EODisplayGroup in the Inspector, the data is automatically fetched when you test your interface.
 ClientSideJava
  Interfaces
  English.
 Palettes
  Open.
Open.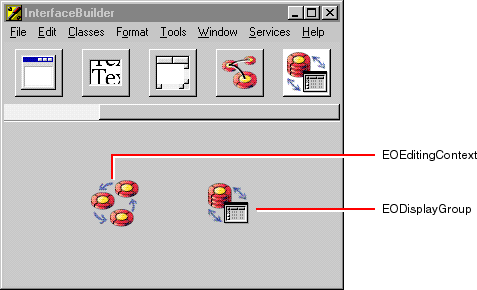
 Test Interface. Click
  in the menu bar to exit the test.
 Test Interface. Choose File
  Exit to exit the test.