 Table
of Contents
  Previous
Section
Binding Elements
This section discusses the basic techniques you use
to bind elements. Further detail is presented in the sections that discuss
specific dynamic elements.

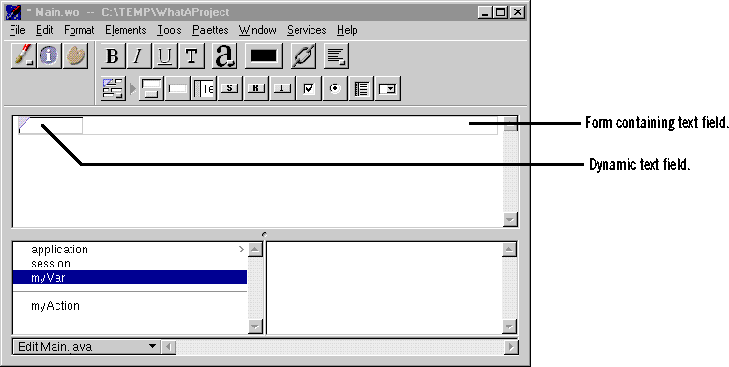
In the figure, you have added a dynamic text field
(WOTextField) to your component. Note the blue triangle in the top left
corner, which distinguishes the dynamic text field from a static HTML text
field. The long rectangle surrounding the text field represents the form
of which it is a part.
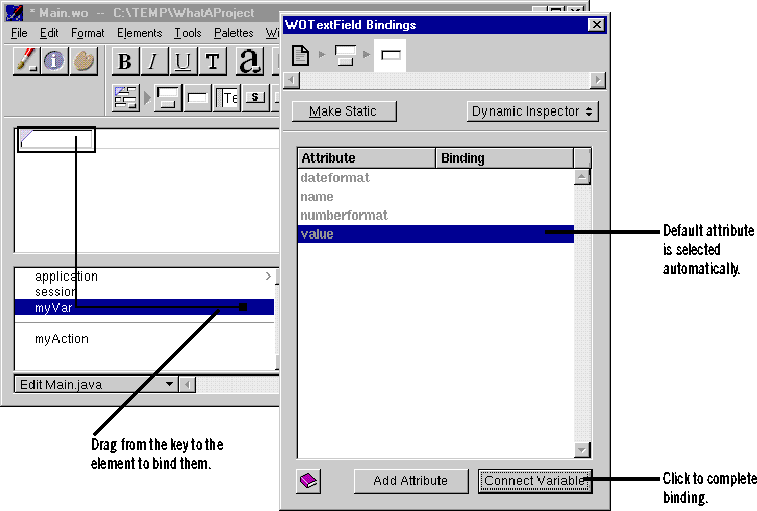
To bind the text field to the variable myVar:
-
Click myVar in the object browser and drag to inside the text field.

A black line appears as you drag, and a black border appears around
the text field, indicating that you can bind to it.
-
Release the mouse button.
The Inspector for that element appears, listing its attributes. The
value attribute is selected by default. (This attribute represents
the value that the user enters into the text field.) If this isn't the
attribute you wish to bind, click another attribute to select it.
-
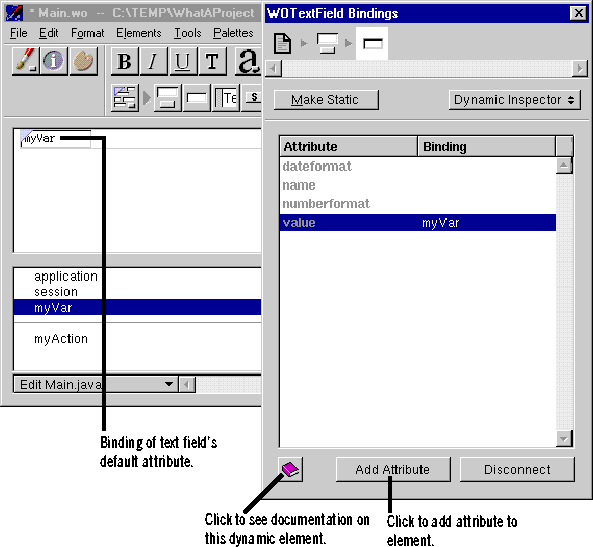
To complete the binding, click the Connect Variable button.
The name of the variable appears in the Binding column next to the attribute.
Note that it also appears inside the text field in the component window.
Some (not all) dynamic elements display the binding for their default attribute
inside the element itself.

-
If you change your mind, you can click the Inspector's Disconnect button
(which changed from Connect Variable) to undo the binding.
There are two other buttons on the bottom of the Inspector
window:
-
Click
 to view documentation on this dynamic
element.
The relevant page from the Dynamic
Elements Reference is displayed in your web browser.
-
Click Add Attribute to create a new attribute for this element.
Typically, you don't add attributes for standard dynamic elements such
as WOTextField or WOString. You use this feature when working with your
own custom WebObjects (see "Custom WebObjects").
To create an additional binding for the same element:
-
Drag from an item in the object browser to the element as before.
This time, a different attribute is selected, since the default attribute
has already been bound.
-
Click Connect Variable to bind the selected attribute.
-
If, instead, you want to bind an attribute that has already been bound,
double-click its row, and the old binding is replaced with the new one.
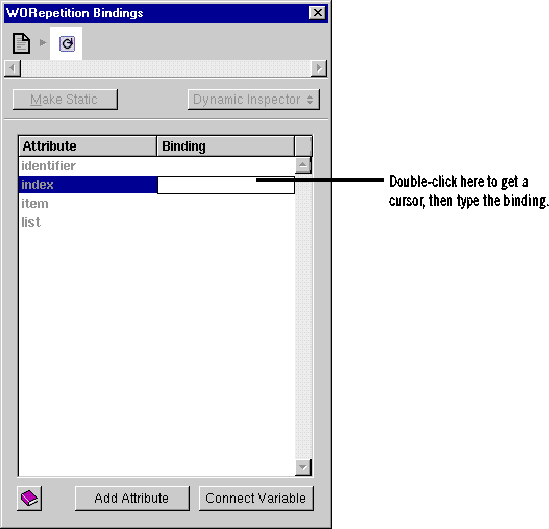
You can also bind an element's attributes by typing
in the Inspector without going through the dragging procedure. To do this:
-
Double-click in the binding column of the row for the attribute you want
to set.

A cursor appears in the Binding column, allowing you to type.
-
Type the binding in the text field, then press Enter.
When entering bindings this way, the following rules
apply:
-
Constant strings (such as "Joe") must be in quotes.
-
Variable and method names (such as Joe) must not be in quotes.
-
Symbolic constants (such as YES and NO) must not be in quotes.
-
Keys must specify their full key path. For example, to bind the
key that is selected in the following figure, you would type session.selectedSailboards.count

 Table
of Contents
  Next
Section

 Table
of Contents
  Previous
Section


 to view documentation on this dynamic
element.

 Table
of Contents
  Next
Section