Building and Running Your Application
Now that you have written all the code necessary for your application to run and have built the user interface and connected the classes together, it’s time to see whether your application compiles. In this chapter, you will learn how to run the process that builds your project into an application. You will also learn how to review errors that occurred while compiling.
In this section:
Build the Application
Run the Application
Correct Build Errors
Great Job!
What’s Next?
Build the Application
To build the Currency Converter application:
In Xcode, choose File > Save All to save the changes made to the project’s source files.
Click the Build toolbar item in the project window.
The status bar at the bottom of the project window indicates the status of the build. When Xcode finishes—and encounters no errors along the way—it displays “Build succeeded” in the status bar. If there are errors, however, you need to correct them and start the build process again. See “Correct Build Errors” for details.
Extra: Check Out the Look Up Documentation
Xcode gives you access to ADC Reference Library content. You can jump directly to documentation and header files while you work on a project. Try it out:
Open the
ConverterController.mfile in an editor window.Option–double-click the word
setFloatValuein the code. (Hold down the Option key and double-click the word.) The Developer Documentation window appears with a list of relevant method names in its detail view. This Reference Library access system provides a fast way to get to reference material. Read more in “Expanding on the Basics.”Close the Developer Documentation window.
Command–double-click the same word. A pop-up menu with a list of method names appears.
Choose
[NSCell setFloatValue]. This time, Xcode displays theNSCell.hheader file in an editor window and highlights the declaration of thesetFloatValuemethod.Close the header file.
Run the Application
Your hard work is about to pay off. Because you haven’t edited any code since the last time you built the project, the application is ready to run.
Choose Build > Build and Go.
After the Currency Converter application launches, enter a rate and a dollar amount.
Click Convert.
Select the text in a text field and choose the Currency Converter > Services submenu.
The Services menu lists other applications that can operate on the selected text.
Choose Currency Converter > Quit Currency Converter from the application menu to quit Currency Converter.
Correct Build Errors
Of course, rare is the project that is flawless from the start. For most applications you write, Xcode is likely to catch some errors when you first build them. Thankfully, Xcode offers tools to help you catch those bugs and move on.
To get an idea of the error-checking features of Xcode, introduce a mistake into the code and click Build again.
You can now see that the left column of your code contains one or more error indicators.
While the error indicator helps you understand the location of the error, you may want to examine the nature of the problem.
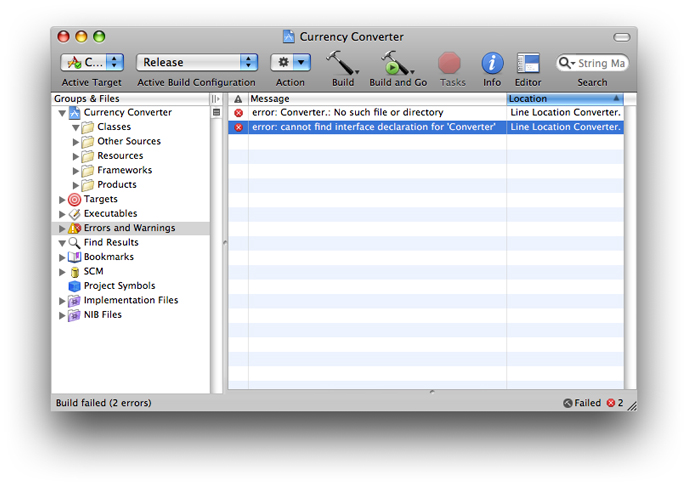
In the Groups & Files list, disclose the Errors and Warnings group if it’s not already disclosed. Xcode lists the files that contain build errors.
Select the file in the Errors and Warnings group or open it in an editor window to display the error. Xcode displays information about the error in the detail view, as shown in Figure 6-1.
Fix the error in the code and build the application again. The Errors and Warnings group clears, and the status bar indicates that the build is successful.
Great Job!
Although Currency Converter is a simple application, creating it illustrates many of the concepts and techniques of Cocoa programming. Now you have a much better grasp of the skills you need to develop Cocoa applications. You learned:
To compose a graphical user interface (GUI) in Interface Builder
To test a user interface in Interface Builder
To specify a class’ outlets and actions in Interface Builder
To connect controller-instances to the user interface by using outlets and actions in Interface Builder
To implement a model, a view and a controller in Xcode
To build applications and correct build errors in Xcode
What’s Next?
In this chapter, you learned how to build and run your application. You also learned how to identify and resolve build errors. In the next chapter, you learn how to set properties such as your application’s name and copyright information. You also learn how to give your application a custom icon.
© 2007 Apple Inc. All Rights Reserved. (Last updated: 2007-10-31)