Product Containers
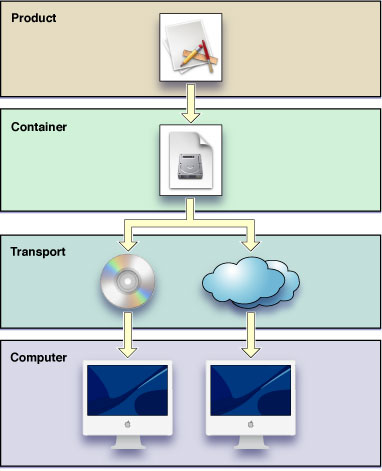
Whether you devise a manual install or a managed install (introduced in “Overview of Software Delivery”) for your product, in general you need to place your product into a container. A container is a file-based enclosure for a product, which facilitates the product’s delivery to a user’s computer. To deliver your product to your users, you may use a transport (delivery vehicle) such as optical media or the Internet. Figure 2-1 illustrates the preferred delivery solution for products in Mac OS X.
ZIP files: If your product can be used in operating systems other than Mac OS X, you may consider using a ZIP archive as the product’s container. To create a ZIP product container in the Finder, select the product directory in a Finder window and use the Create Archive command. You may also use the zip(1) command-line tool.
Disk images are the preferred container for software products on Mac OS X. They allow you to group a set of files in a compact format that is easily handled by users. These enclosures are easily transported across a network because they appear as a single file. To access the contents of a disk image, a user double-clicks it in the Finder, which opens a standard Finder window showing the disk image’s contents. Compressed disk images allow you to use delivery vehicles—space-limited optical media or bandwidth-strapped networks—more efficiently.
The best container for delivering a product through the Internet is an Internet-enabled disk image. These containers are automatically opened and disposed of. Users need only move the product to a convenient location. See “Manual Installs” for more information.
The following sections describe how to place a product on a disk image and how to configure a disk image to provide a streamlined install experience when it’s downloaded from a network, such as the Internet or an intranet.
In this section:
Creating a Disk Image
Internet-Enabling a Disk Image
Adding a License Agreement to a Disk Image
Creating a Disk Image
The Disk Utility application (/Applications/Utilities) allows you to create a disk image from a folder, as described in the following steps.
Create a directory named after your product, containing the product’s files, such as the
Atom 1.0.0directory shown in Figure 2-2.In Disk Utility, use the New Image from Folder command to create a disk image of the product directory.
To produce the smallest disk-image file possible, use the compressed disk-image format.
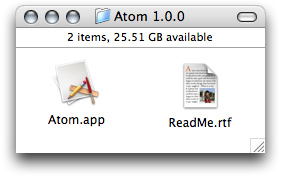
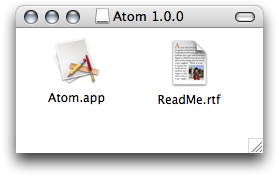
Figure 2-3 shows how a user may see the contents of the disk image after opening it in the Finder.
Tip: To make it easier for users to place disk-image-delivered applications in the /Applications directory, include a symbolic link to the /Applications directory as part of the disk image’s contents.
Internet-Enabling a Disk Image
Although all disk images can be transported through the Internet, users need to open them, retrieve their contents, and discard them. An Internet-enabled disk image automates this workflow. After a user downloads an Internet-enabled disk image from a network using a web browser, the image is automatically opened, its contents placed at the user’s download location, and discarded (in the Trash). This improves the manual install experience by performing a few tedious tasks for the user.
To Internet-enable a disk image, use the hdiutil(1) command-line tool, as shown in Listing 2-1.
Listing 2-1 Internet-enabling a disk image
hdiutil internet-enable -yes <path_to_disk_image> |
Adding a License Agreement to a Disk Image
The Disk Utility application can display a multilingual license agreement before opening a disk image. Disk Utility does not open the image unless the user agrees with the license.
To create a disk image with a license agreement, get the Software License Agreement for UDIFs software development kit (http://developer.apple.com/sdk/index.html). This SDK explains how to add a license agreement to a disk image and includes the resources necessary for this task.
© 2006 Apple Computer, Inc. All Rights Reserved. (Last updated: 2006-07-24)