Creating a Project in Xcode
Every Cocoa application starts life as a project. A project is a repository for all the elements that go into the application, such as source code files, frameworks, libraries, the application’s user interface, sounds, and images. You use the Xcode application to create and manage your project. In this chapter, you will learn to create a project, and see what all the various parts of a project are for. In the process, you will learn how to navigate the Xcode user interface, and you will learn about all the different folders available for you.
In this section:
Open Xcode
Make a New Project
What’s Next?
Open Xcode
To open Xcode:
In the Finder, go to
/Developer/Applications.Double-click the icon, shown in Figure 2-1.
The first time you start Xcode, it takes you through a quick setup process. The default settings should work for the majority of users.
Make a New Project
This section will guide you through the process of creating a project. Though it is focused on creating a project suitable for Currency Converter, you will learn about other options available to you when creating a new project.
Choose the New Project Command
To create a project, choose File > New Project. The New Project Assistant appears.
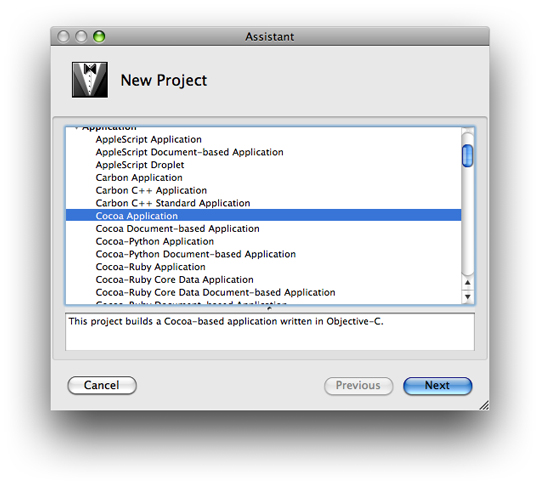
Choose a Project Type
Xcode can build many different types of applications, including everything from Carbon and Cocoa applications to Mac OS X kernel extensions and Mac OS X frameworks. For this tutorial, select Cocoa Application and click Next, as shown in Figure 2-2.
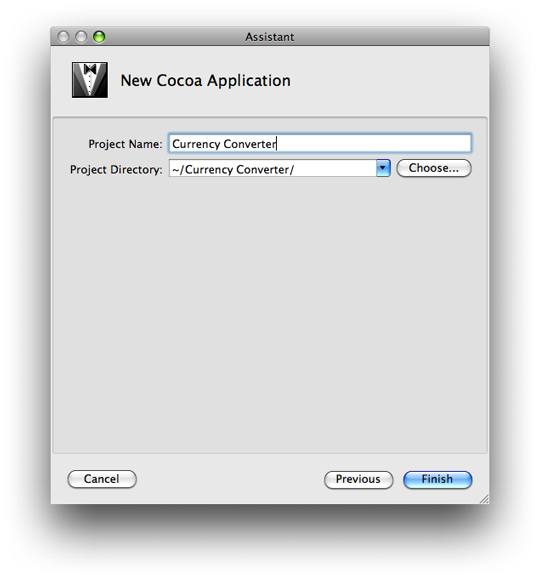
Type the project’s name, Currency Converter, in the Project Name field, as shown in Figure 2-3.
Click Choose to navigate to the directory where you want your project to be stored. The pop-up menu Project Directory eventually fills up with your frequently used directories. Use this to save time in the future.
Click Finish.
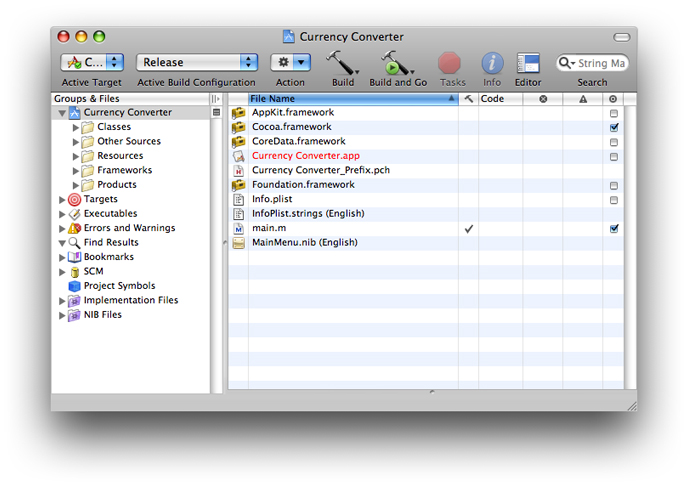
When you click Finish, Xcode creates the project’s files and displays the project window, shown in Figure 2-4.
The Xcode Project Interface
The Groups & Files list is provided for you to easily navigate through your project’s files and traits. All the source files, images, and other resources that make up a project are grouped in the project group, the first item in the Groups & Files list; this group is named after the project (here, Currency Converter). The project’s files are grouped into subgroups, such as Classes, Other Sources, Resources, and so on, as shown in Figure 2-4. These groups are very flexible in that they do not necessarily reflect either the on-disk layout of the project or the way the build system handles it. They are purely for organizing your project. The groups created by Xcode should be suitable for most developers, but you can rearrange them however you like.
These are the groups Xcode sets up for Cocoa applications:
Classes. This group is empty at first. You will be placing here all the classes required by your application.
Other Sources. This group contains the
main.mfile, which defines themainfunction that runs the application. (You shouldn’t have to modify this file.) It also containsCurrency Converter_Prefix.pch. This “prefix header” helps Xcode to reduce compilation time. This file is not important for this tutorial.Resources. This group contains the nib files and other resources that specify the application’s user interface. “What Is a Nib File?” describes nib files.
Frameworks. This group contains the frameworks (which are similar to libraries) that the application uses.
Products. This group contains the results of project builds and is automatically populated with references to the products created by each target in the project.
Below the project group are other groups, including smart groups. Smart groups—identified by the purple folders on the left side of the list—allow you to sort the project’s files using custom rules in a way similar to using smart playlists in iTunes.
These are some of the other groups in the Groups & Files list:
Targets. This group lists the end results of your builds. This group usually contains one target, such as an application or a framework, but it can consist of multiple items.
Executables. This group contains the executable products your project creates.
Errors and Warnings. This group displays the errors and warnings encountered in your project when you perform a build.
Curious folks might want to look in the project directory in Finder to see the files it contains. Among the project files are:
Currency Converter.xcodeprojThis package contains information that defines the project. You should not modify it directly. You can open your project by double-clicking this package.
main.mAn Objective-C file, generated for each project, that contains the
mainfunction of the application.
English.lprojA directory containing resources localized to the English language. In this directory are nib files automatically created for the project. You may find other localized resource directories, such as
Dutch.lproj.
What’s Next?
In this chapter, you made a project in Xcode, which will contain all the resource files you will be creating in the course of designing and implementing a Cocoa application. In the next chapter, you will learn how to create the model, or the basic functionality behind an application.
© 2007 Apple Inc. All Rights Reserved. (Last updated: 2007-10-31)